As a reminder, I am basing my Houppelande pattern off of Cynthia Virtue’s theory of Houp-ness.
This is how I spent my weekend because my legs were le tired after saturday morning’s run. (I skipped an SCA event because after I showered, the idea of leaving my couch was not appealing.)
Here’s the deal, I’ve cut my quarter circles already, so I’ll be skipping that part here. I haven’t cut all the ends off all my circles, I’ll be doing the last batch tonight and I’ll be sure to take pictures.
Anyway, there are a few major parts to making Houppelandes. This is the order I figured out was best.
- Cut your fabric
- Sew in triangle pieces
- Sew body of the garment together
- Sleeves
- Hem
However, the actual order for the muslin was:
- Cut your fabric
- Sew body of the garment together
- Sleeves
- Triangle pieces
- Hem
My first effort is always on my muslin copy. This part will be hidden or destroyed no matter what I make, especially if I’m unsure of what I’m doing. Behold, messiness. It’s like making cookies, sorta.
The main thing I was worried about was shoulder width, so, I measured myself some of my favorite clothing that fits me well in the shoulders and came up with a number (about 5 inches, for the curious among you). My Houppelande is also going to be more masculine, so it only comes to just above my knee, for a length of about 38 inches in radius. Neckline has sides of about 9 inches a piece, as well as arm holes of the same size. I measured everything and marked the fabric with chalk.
However, I did screw up one important thing. How thick is my neck? It is not, as I weirdly measured, 20 inches around. My neck does not look like Dwayne “The Rock” Johnson’s.


Yeah, that’s not going to work.
TO SEWING. 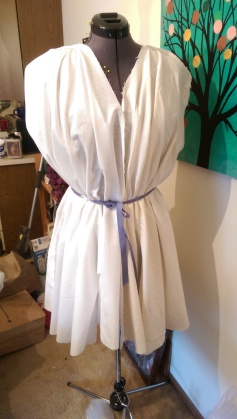
My muslin, I sewed the sides and shoulders together first, just to make sure things look sufficiently large. It looks kinda cute with the blue ribbon, actually.
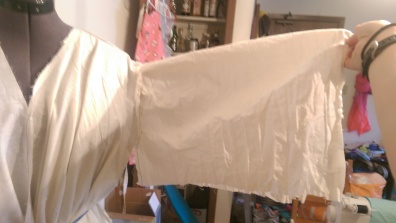
I made the sleeves by basically holding muslin up to my arm and going “Eh, looks all right.” I then sewed my first stitch in the sleeves. This was so I could do some gathers for the shoulder seams.
For those of you who don’t know how to do a gather, it’s super easy. Pull gently on your thread (this might take a couple of tries to find the right end/thread to pull) and move the fabric gently towards the middle (in this instance). 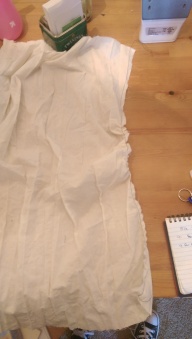
It looks like so when you’re done. When you sew it in, you want to sew slightly beyond where the seam for gathers are for two reasons: First, you want to hide the gather seam. Second, you want your gathers to stay where you put them. This means that you’re effectively sewing them in place. If you do this correctly, you’ll have a nice shoulder piece just from a gather. It fits together well, and you’ll have plenty of arm room with this. I only sewed on one arm at this point because I had forgotten to cut out sleeves in the other two fabrics.
I also cut the sleeve a tad too wide. Whoops. Easily fixed.
All well and good, until you remember that the front and back need to have two triangles inserted into the neckline. We all remember what happened when I tried that on my burgundian.  Well, different verse, same as the first. Like I said, this is why I made a muslin.
Remember the Rock? This is where and why we start seeing issues.
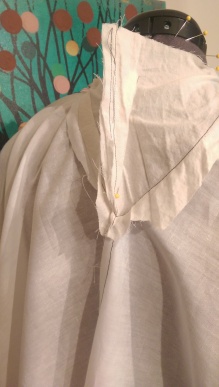
There’s about an inch on every seam that needs to be taken in, otherwise, the houpelande won’t sit on my shoulders, but rather slide down. Why? Well, because I miscalculated my neck size. When you have a relatively tiny neck compared to say, The Rock, you don’t need as big of triangles for the front and back gores.
Good thing for the muslin, right? 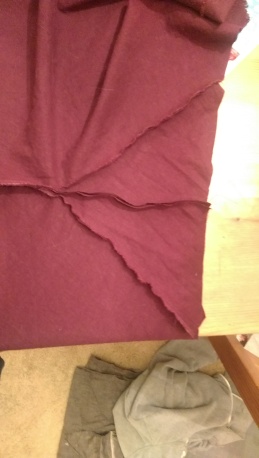
I still have the puckering on the darn thing, especially in the front. The front is especially problematic and continues to be an issue for me even after I moved onto the first layer of linen.
What worked best was sewing the triangles on BEFORE I sewed the body together. It looks a bit different at first, but it allows for easier placement of the gores, makes sewing up the sides easier and makes the whole thing look a bit more smoothly executed.
And that’s pretty much where I left it after this weekend.
I think the front puckering will be easily solved by making it sort of the cheater version of sewing in invisible zippers: Sew up the seam, make sure you’ve adjusted the machine for larger stitches, and then place the zipper. Sew it in, rip the center seam. I will report back.

Lol
LikeLike